I want to have this stick!
This is fantastic!
I want to have this stick!
This is fantastic!
Today, I attended the ThreadTech Workshop at the Edge in Southbank, Brisbane. The Edge is a digital culture centre and an initiative of State Library of Queensland. They offer free or low cost Workshops.
Today’s workshop was free and all the materials were supplied.
The workshop is described as follows in the Edge website;
ThreadTech workshops by Colleen Morgan
Step into the world of future fashion at our ThreadTech workshops. In the introductory workshop you will learn how to sew a circuit with LEDs and conductive thread to make your very own light laden motif. Come along to the advanced workshop to up the ante and learn how to program LED lights to flash, fade and blink. Prior experience required for the advanced workshop.
At the moment, I am very interested in LED lights and electric circuit, so I was very excited when I found this workshop. I am attending how to program the lighting effects next Saturday and I am looking forward to it.
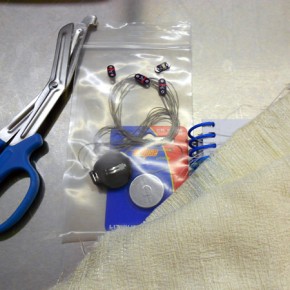 Materials: 4 x Lily PadLED Lights, Conductive Thread (Silver plated nylon), Coin Power Battery CR2032, Battery Holder
You can buy LilyPad LED lights and Conductive Thread at Little Bird Electronics http://littlebirdelectronics.com/ (Australia), and Battery Holder at Jaycar http://www.jaycar.com.au/
I chose 3 red lights and one yellow. I want to try blue and white next time. The instructor, Colleen said that blue lights seem to use more power than other lights. With Battery we used today, 4 lights would be maximum.
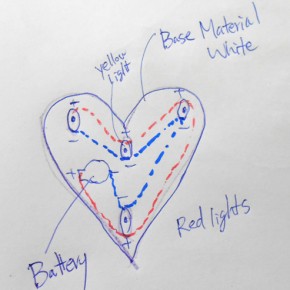 Then you think of the design.Where to locate the lights. You have to saw one thread for positives and connect to the positive side of battery holder, another thread for negatives and connect to the negative side of the battery holder.
I chose a heart for my design and chose a cream kind of fabric to saw.
When you design the circuit, you have to be careful with not touching positive thread and negative thread.
Saw the Battery holder at the back.
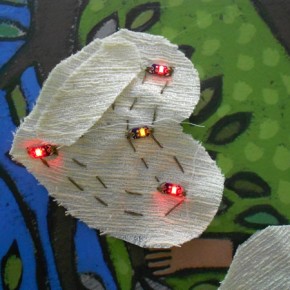
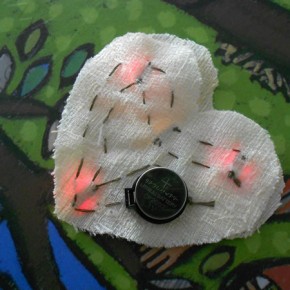 Place a battery and you are done.
After I came home, I tried to see through with other fabrics and you can see different effects on each fabric. It is very interesting and I really enjoyed the workshop.
They are hand washable (not with the battery).
I was not sure whether the shape of the heart can be seen. I was happy that I can see the heart shape in the dark (showing at the top)
I cannot wait to learn more next week. ![]()
We bought some Solar Garden Lights for Xmas.
At night inside the house, we tried to see how they work. They were like Mirror Balls and their lights reflected on the wall. They changes colours from blue, green and red.
I thought that I should try to take photos of them with Slow Shutter again.
Some of the photos are taken when two people are holding and moving them, and some of the photos were taken when I moved them around with my hands.
Camera: Nikon DS3100, Setting: 10″ F14
Please have a look at the results below.
During this school holiday, we went for camping with our friends.
At night time, we tried light art. I asked kids to trace one of the kids with flash lights and I like the effects.
I also took some photos when kids drew with sparkles.
Camera: Nikon D3100. Setting: Slow shutter 10 sec, F14, ISO 400.
We had a small gathering for the Earth Hour on Saturday, 26 March 2011. We have been participating Earth Hour since 2008. This is our 4th year.
Some Kids who joined us this year for the first time made lanterns using recycling materials; decorate a empty jar with papers, ribbons, confetti, cello, and etc. I tied the jar on a stick from the garden with wires.
We did other recycle crafts using plastic bag to make some badges – cut the plastic bag into the shape, draw on them, place on the felt, place the baking paper on the top, then press by the iron. The artwork sticks onto the felt and cut the felt along the shape. (when you use the iron, place the baking paper on the top and press for 20 sec. or so)
When we turned the light off at 8:30pm, a candle light concert was started. Talented kids played flute, clarinet, piano and violin.
After the concert, kids enjoyed light arts. I asked kids to draw with the flash lights and I took the photos. I divided kids into two groups – boys and girls. Boys are young kids between 6 to 10, so the drawings were basic, but quite effective. Girls discussed what they wanted to draw, and they drew a cat, a bunny and peace sign. Girls worked well as a team and their drawings were impressive.
Please have a look at their artworks.
Note: Last 5 photos were not taken on the Earth Hour. Photo taken by Nikon DS3100 with slow shutter speed.
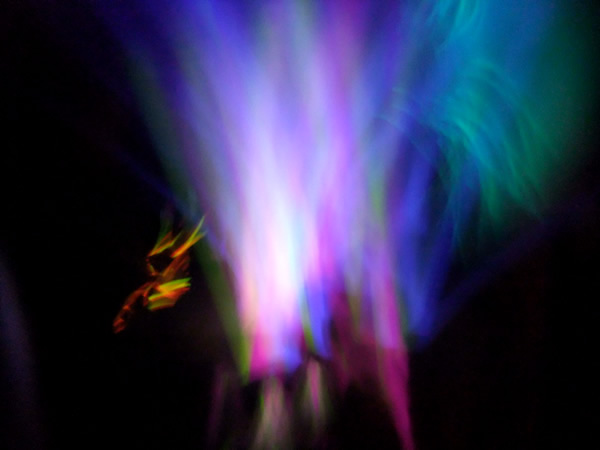 Every time we go camping, I take glow sticks.
At night, I let kids to move them as they wish and I take photos with slow shutter setting.
There were three kids moving the sticks in these photos.
They moved sticks left to right quickly and tossed them into the air and so on.
Every time I took a photo, they checked the image, and they decided the next movement.
Kids enjoyed and it was fun for me, too.
I would like to share my experiments about the light arts. I have been trying using different kind of lights.
In the last post, we used Fire Sparkles. This time, I would like to show you the effects by LED colour lights.
The first image was used blue, red and white LED lights. My son moved the lights and I took the photo with slow shutter.
I found these colour LED lights at $2 for three at the shop near my home.
My son wanted to buy them to put on his fingers to be like a super hero.
I wondered what kind of effects that we can see using different colours of lights with slow shutter shot and you can see the effects below.
Camera Setting: Manual Setting – Speed – Slowest with my camera 8 sec. F6.4. Self timer.
I would like to show the light art using a LED flash light.
You may have better effects if you cover your flashlight with a bubble wrap. It helps to make the light’s line clearer and sharper.
I took these photos and wrote the letters by myself. I took the photos for each letter and put the letters together later.
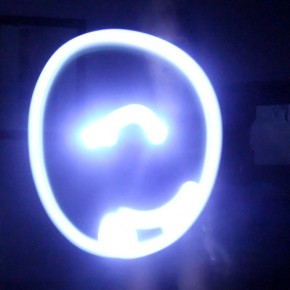 I tried to draw smiley face, however, it came out as a sad face….
I should have turned the light off when I finish one line and turn the light on again for a new line.
I had only 8 seconds to draw because it was the maximum time that I could set with my compact camera. I did not have enough time to draw something more complex.
If you can set the shutter speed slower like 15 seconds or something, you can draw something more interesting.
Materials: Flashlight, Bubble Wrap, and Camera
Camera Setting: Manual Setting – Speed – Slowest with my camera 8 sec. F6.4. Self timer.
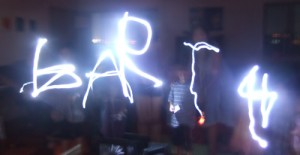 I asked kids to draw letters. It should be read as “Earth”. It was a bit difficult for little kids to draw mirror letters. It would be much easier for kids over 10 year old.
Have fun!
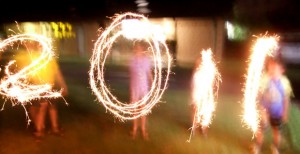 Hi, I would like to share an idea of Light arts with sparkles.
I have been trying and comparing the effects of the Light Arts with using different kind of lights. I think that the Sparkles are the best so far.
I will introduce you different type of lights what I have used in the past in the near future.
You do not have to have a special camera to achieve this light art.
Camera: Fuji Film FinePix F70 (Compact Camera)
Camera Setting: Manual Setting – Speed – Slowest with my camera 8 sec. F6.4.
Enjoy!